
Here is something new.
With the help of Volkswagner, thank you Volks!, I have imaged my DT using Clonezilla. The result is a folder with the structure needed for Clonezilla to restore this image to your DT. This should suffice as a simple method for anyone to install linux to their WebDT!
Before I made the backup we changed grub to not use uuid, erased /etc/udev/rules.d/70-persistent-net.rules and erased /etc/network/interfaces. So hopefully none of the mac addresses from my wireless card or uuid of my drive will get in your way.
Okay lets install this on your DT. First you will need an image of Clonezilla.
http://free.nchc.org.tw/clonezilla-live/oldstable/clonezilla-live-20110325-maverick.iso
Here is the image of my backup:
http://www.filefactory.com/file/ce72b7a/n/WebDT366-Debian6-2011-06-12-16-img.zip
You will need the standard stuff. A usb keyboard, usb drive to hold the WebDT image on and either a usb-cdrom or a second thumb drive with Clonezilla on it to boot to.
There is only one way that this could possibly not work. It seems the DT366 came with two different size 500 mb internal flash chips. They are exactly 11mb in difference. When I went to restore my DT360 with the image generated from my DT366lx800 I ran in to this. Clonezilla offered to change the size of the partition however it did not work. Make sure you have a 512 mb chip or this may not work for you.
Boot the machine via Clonezilla live ^TOP^
In this example, the machine has 2 disks, 1st disk's name is sda (device name in GNU/Linux), 2nd disk's device name is sdb. We already have a Clonezilla image in sdb, the image name is called "lucid-2010-07-28-07-img". and its contents is:
root@debian:~# ls -alFh /home/partimag/
total 512
drwxr-xr-x 7 root root 168 2010-07-28 07:12 ./
drwxr-xr-x 4 root root 80 2010-07-28 07:15 ../
drwxr-xr-x 2 root root 48 2010-07-28 07:07 DOCS/
drwxr-xr-x 2 root root 512 2010-07-28 07:12 lucid-2010-07-28-07-img/
drwxr-xr-x 2 root root 48 2010-07-28 07:07 Photos/
root@debian:~# ls -alFh /home/partimag/lucid-2010-07-28-07-img/
total 220M
drwxr-xr-x 2 root root 512 2010-07-28 07:12 ./
drwxr-xr-x 7 root root 168 2010-07-28 07:12 ../
-rw-r--r-- 1 root root 4 2010-07-28 07:12 disk
-rw-r--r-- 1 root root 34K 2010-07-28 07:12 Info-dmi.txt
-rw-r--r-- 1 root root 18K 2010-07-28 07:12 Info-lshw.txt
-rw-r--r-- 1 root root 1.4K 2010-07-28 07:12 Info-lspci.txt
-rw-r--r-- 1 root root 260 2010-07-28 07:12 Info-packages.txt
-rw-r--r-- 1 root root 10 2010-07-28 07:12 parts
-rw------- 1 root root 216M 2010-07-28 07:12 sda1.ext4-ptcl-img.gz.aa
-rw------- 1 root root 2.3M 2010-07-28 07:12 sda5.ext4-ptcl-img.gz.aa
-rw-r--r-- 1 root root 36 2010-07-28 07:11 sda-chs.sf
-rw-r--r-- 1 root root 1.0M 2010-07-28 07:11 sda-hidden-data-after-mbr
-rw-r--r-- 1 root root 512 2010-07-28 07:11 sda-mbr
-rw-r--r-- 1 root root 434 2010-07-28 07:11 sda-pt.parted
-rw-r--r-- 1 root root 310 2010-07-28 07:11 sda-pt.sf
-rw-r--r-- 1 root root 53 2010-07-28 07:12 swappt-sda2.info
Now the image "lucid-2010-07-28-07-img" will be restored to disk sda.
Once you have the bootable Clonezilla Live CD/DVD or USB flash drive, you can boot the machine you want to clone via Clonezilla live. Remember to use the Clonezilla live CD or USB flash drive to boot the machine. For example, if you have Clonezilla Live in USB flash drive, you have to boot it via USB device (Ex. USB-HDD or USB-ZIP). If necessary, you can set the first boot priority in the BIOS as USB-HDD or USB-ZIP so that it can boot Clonezilla Live from your USB flash drive.
Here we take CD as an example. You can either set CD as first boot priority in machine's BIOS like this:
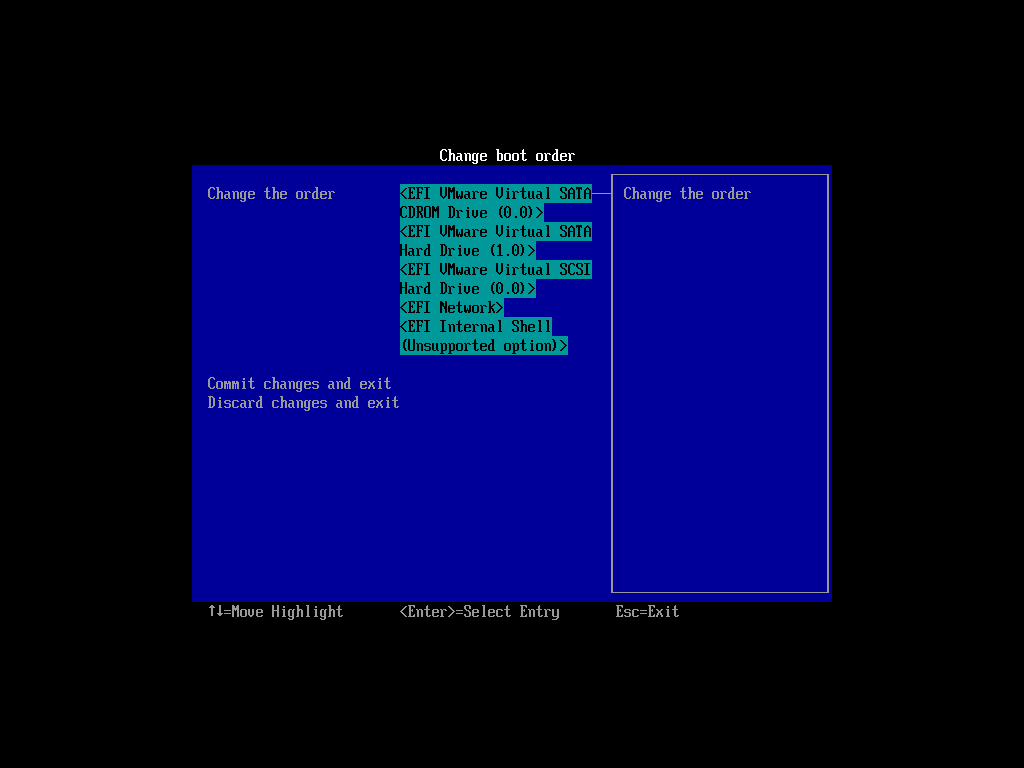
Or by pressing a hotkey (e.g. Esc or F9) when you boot the machine, you will see the boot menu of BIOS like this:

Check your motherboard manual for more details about how to boot your machine via CD.
The boot menu of Clonezilla live ^TOP^
Here is a screenshot of Clonezilla Live boot menu:
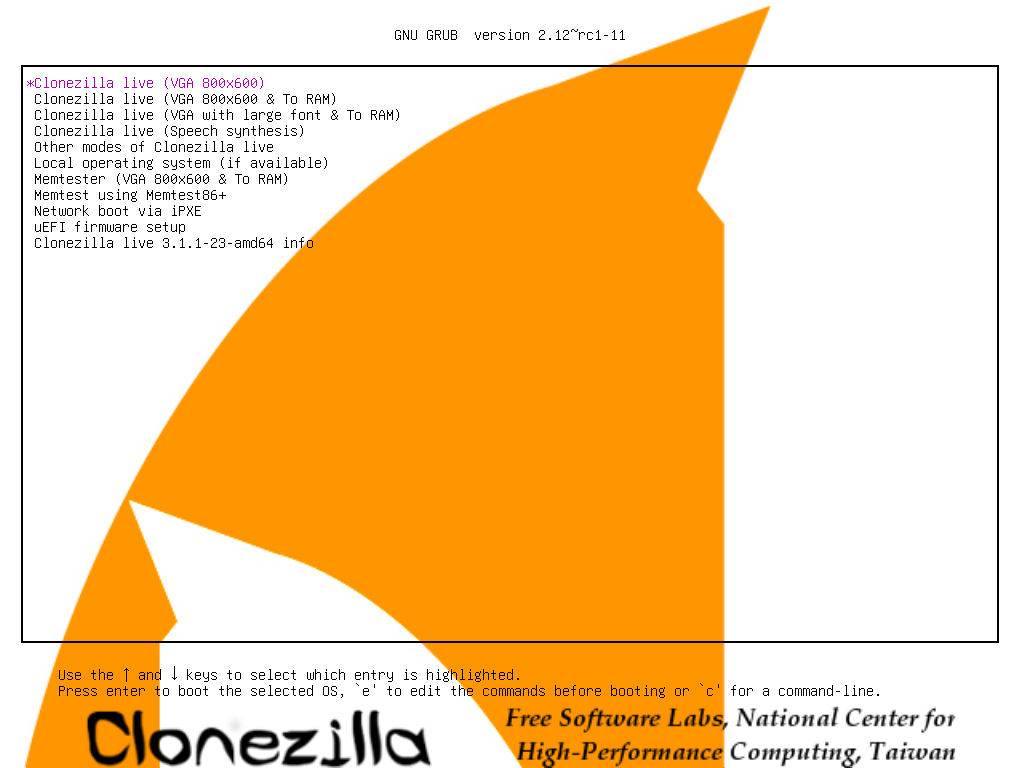
The first one is the default mode for Clonezilla Live. It will default to framebuffer mode with a resolution of 1024x768.
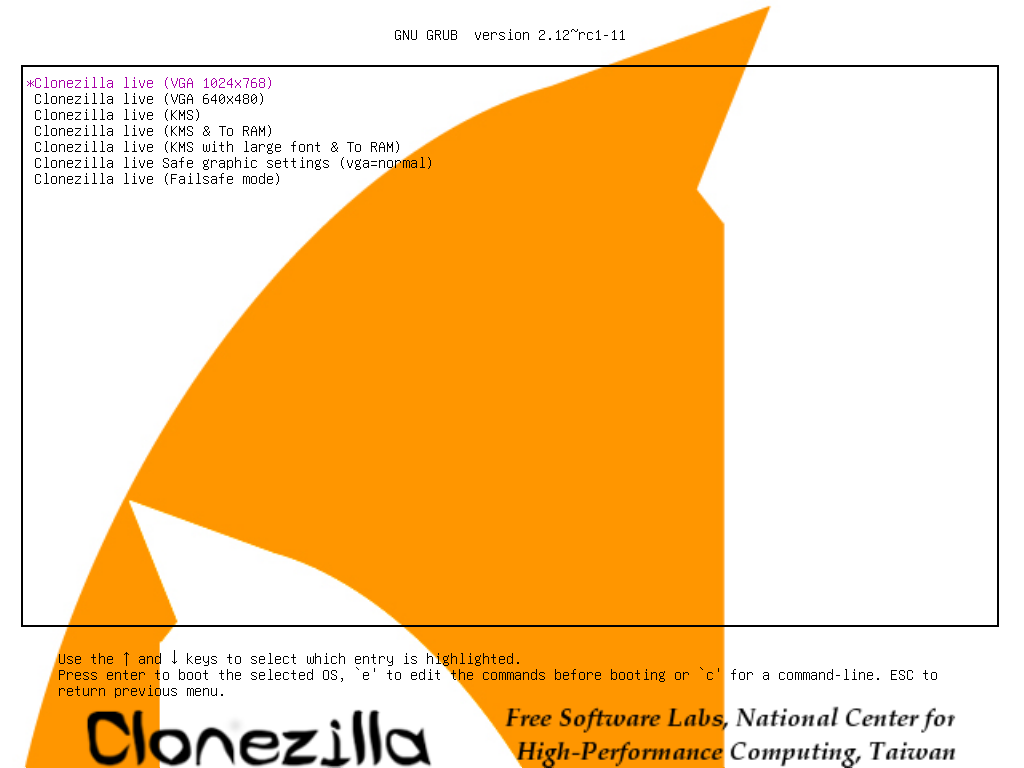
There are more modes which you can choose in the 2nd choice "Other modes of Clonezilla live", e.g. 800X600 or 640x480 one if you want, as shown here:
The choice, "Clonezilla live (To RAM. Boot media can be removed later), is the same function with the 1st one except when Clonezilla live booting finishes, all the necessary files are copied to memory. Therefore you can remove the boot media (CD or USB flash drive) then.
If you do not need Chinese or Japanese environment or if your computer experiences problems in the framebuffer mode, you can choose the one "Clonezilla Live (no framebuffer)" to clone in the English environment.
The choice, "Clonezilla live (failsafe mode)", is for something goes wrong when you are not be able to boot your machine, such as ACPI of your machine is not supported in the kernel.
If you want to boot local OS in your harddrive, you can choose the one "Local operating system in harddrive (if available)". This is an extra function in the boot media that has nothing to do with Clonezilla Live.
The choice, "FreeDOS", allows you to boot your machine into Free DOS. This is an extra function in the boot media that has nothing to do with Clonezilla Live.
The choice, "Memory test using Memtest86+," is for memory testing using Memtest86+. This is an extra function in the boot media that has nothing to do with Clonezilla Live.
The choice, "Network boot via etherboot" or "Network boot via gpxe" is used to perform a network boot via Etherboot or gPXE. If your computer does not have a PXE network, you can use this to do boot from a network. This is an extra function in the boot media that has nothing to do with Clonezilla Live.
Here we choose 800x600 mode, after pressing Enter, you will see Debian Linux booting process ^TOP^
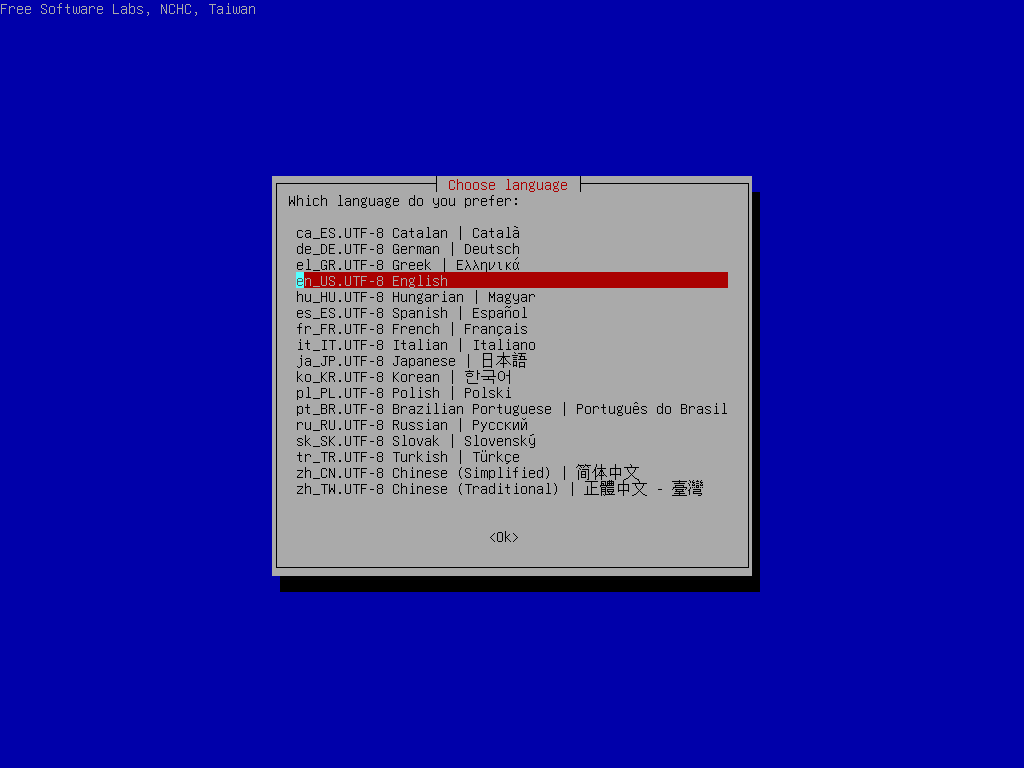
Choose language ^TOP^
Choose keyboard layout ^TOP^

The default keyboard layout is US keybaord, therefore if you are using US keyboard, just press enter (i.e. use the option "Don't touch keymap").
If you want to change keymap, you can either choose "Select keymap from arch list" or "Select keymap from full list".
///NOTE/// There is a bug when choosing French keymap in "Select keymap from arch list", so use "Select keymap from full list" to change keymap if you are using French keyboard.
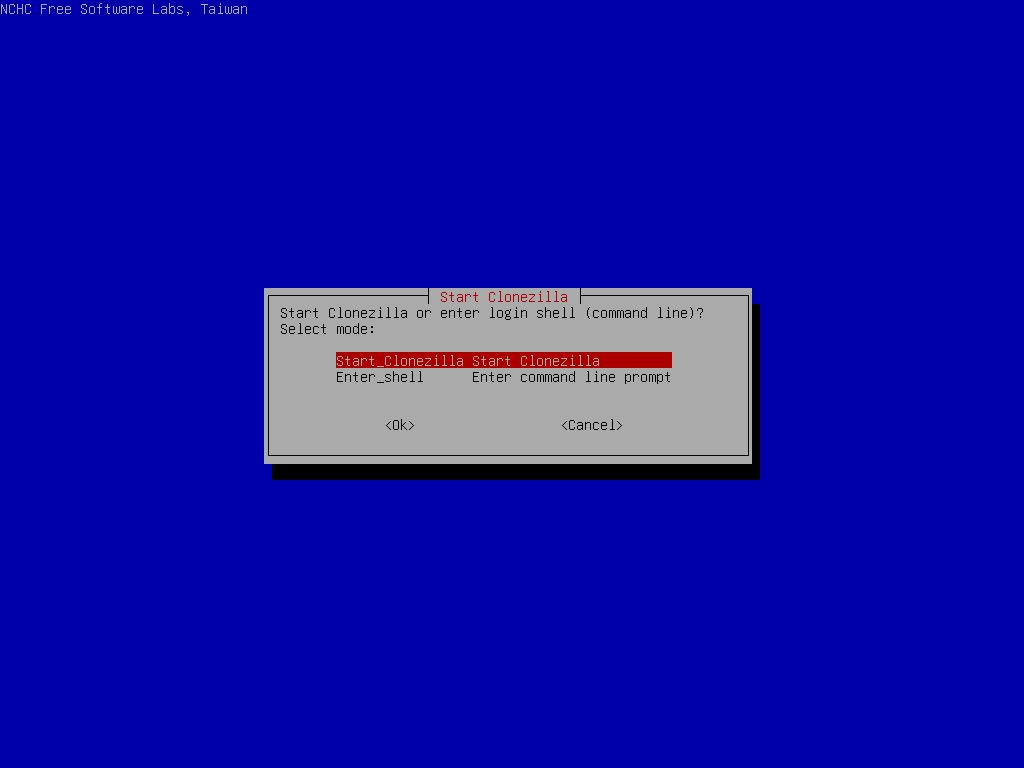
Choose "Start Clonezilla" ^TOP^
Choose "device-image" option ^TOP^
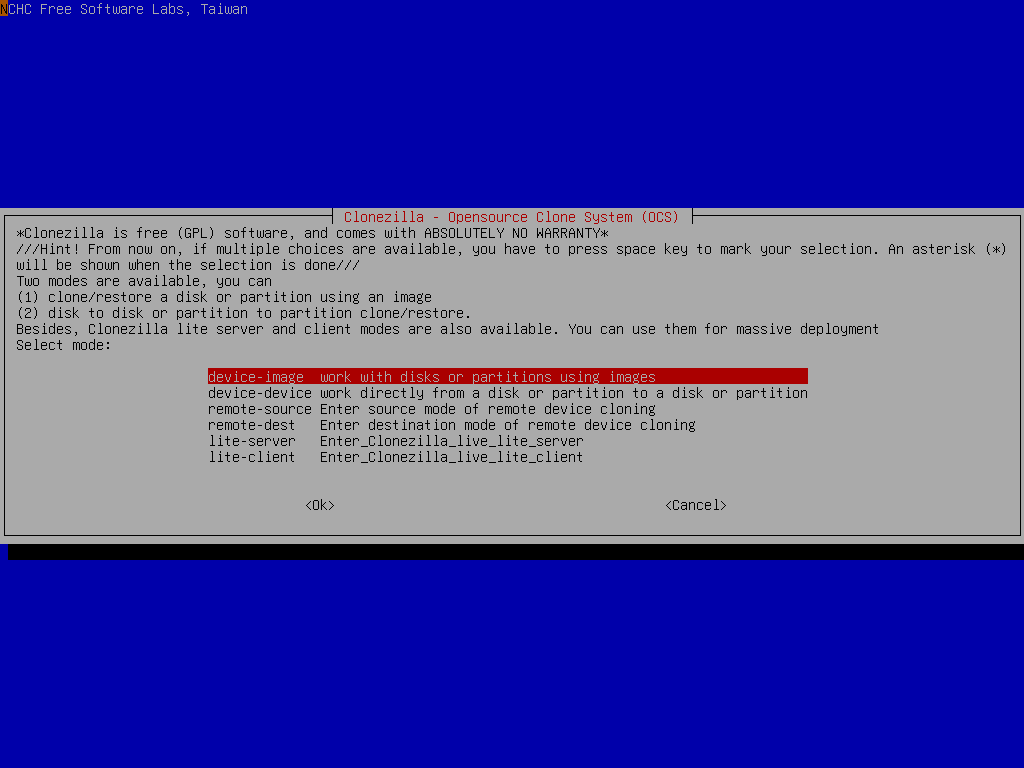
Pay attention to the hints, too. You might need that:
///Hint! From now on, if multiple choices are available, you have to press space key to mark your selection. A star sign (*) will be shown when the selection is done///
Choose "local_dev" option to assign sdb1 as the image home ^TOP^

There are other options, e.g. sshfs, samba or nfs, you can use when network is available. This is very useful when 2nd local disk is not available.
Since we choose "local_dev" option, we can use 2nd disk or USB flash drive to save 1st disk's image. If using USB flash drive as repository, inster USB flash drive and wait a few secs.

Select sdb1 as image repository, then choose "restoredisk" option ^TOP^

If you are not familiar with the disk or partition name in GNU/Linux, read the hints:
'The partition name is the device name in GNU/Linux. The first partition in the first disk is "hda1" or "sda1", the 2nd partition in the first disk is "hda2" or "sda2", the first partition in the second disk is "hdb1" or "sdb1"... If the system you want to save is MS windows, normally C: is hda1 (for PATA) or sda1 (for PATA, SATA or SCSI), and D: could be hda2 (or sda2), hda5 (or sda5)...'

Then Clonezilla shows you the disk usage report:

Here we choose "Beginner" mode:

If you choose "Expert" mode, you will have some chances to choose advanced parameters, e.g. imaging program, compression program, etc.. You can see more details here.
Now you can select "restoredisk" option:

Select image name and target disk ^TOP^
Choose the Clonezilla live image as source image:

Select the target disk "sda" we want to restore:

Clonezilla will prompt us the command to restore the image. This command is very useful when you want to create a customized Clonezilla live:

Before starting to restore the disk image to disk sda, Clonezilla will ask you to confirm that TWICE:


Clonezilla is restoring disk image on 2nd disk (sdb) to 1st disk (sda) ^TOP^
Clonezilla now is restoring the selected disk image to 1st disk (sda). The job is done by restoring:
MBR (by dd), and Boot loader (by grub)
Partition table (by sfdisk).
Data on every partition or LV (logical volume) (by partimage, ntfsclone, partclone or dd. It depends on the image of each partition or LV.)


When everything is done, Clonezilla will prompt you if you want to run it again,
'Stay in this console (console 1), enter command line prompt'
'Run command "exit" or "logout"'

Then you can choose to:
Poweroff
Reboot
Enter command line prompt
Start over

Here we choose Poweroff (0), then when the shutdown process is done, it will ask you to remove the disk and close the try (if any) then press ENTER.

That's all. The 1st disk (sda) is ready to be used.